
The Importance of High-Quality Diamond Photography for Online Listings
In the world of online jewelry sales, the way a diamond is presented can have a direct impact on its perceived value and likelihood of selling. Because online buyers do not have the opportunity to see or touch the item in person, they rely heavily on images to assess quality, beauty, and authenticity. Therefore, high-quality, accurate photography is essential for any seller looking to attract serious buyers and maintain credibility. Poorly lit, blurry, or misrepresentative images can result in a lack of interest, negative reviews, or even returns. On the other hand, well-composed and professionally executed photographs can highlight the fire, brilliance, and clarity of a diamond, effectively communicating its desirability and justifying its price point. This is especially crucial when selling through marketplaces like eBay, Etsy, or specialized jewelry resale platforms where visual presentation can differentiate your listing from hundreds of others. Whether you are a private seller or a business, mastering the art of diamond photography is not merely a matter of aesthetics—it’s a critical sales tool.
Understanding the Optical Qualities of Diamonds
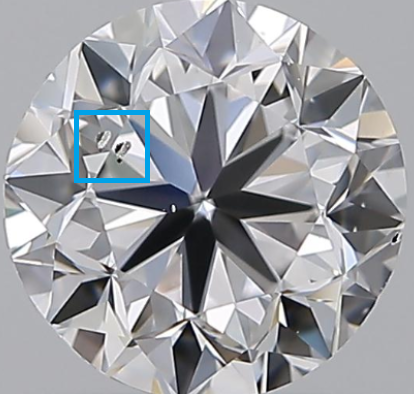
To effectively photograph a diamond, it’s essential to understand the unique optical characteristics that give it visual appeal. Diamonds are valued for three main visual phenomena: brilliance (white light reflection), fire (colored light dispersion), and scintillation (sparkle when the diamond moves). Capturing these traits on camera requires more than simply pointing and shooting; it involves using precise lighting, angles, and camera settings to manipulate how light interacts with the stone. Additionally, the cut of the diamond plays a significant role. Round brilliants, for example, are optimized to reflect maximum light, while step-cut diamonds like emerald or Asscher cuts emphasize clarity and produce a more subtle sparkle. These characteristics influence how the diamond should be lit and photographed. Clarity and color, often evaluated through magnification and light balance, can also be emphasized or diminished depending on camera positioning and exposure. For buyers evaluating a diamond’s quality online, accurate visual representation of these qualities is crucial. Misleading photos not only damage trust but can also create problems during returns or appraisals.
Essential Equipment for Diamond Photography
To capture a diamond at its best, you’ll need more than a smartphone camera. While modern smartphones have improved significantly, they still fall short in key areas such as macro capability, white balance control, and depth of field precision. A DSLR or mirrorless camera with a macro lens is highly recommended. Macro lenses allow you to focus closely on the diamond, capturing intricate details such as the facets, inclusions, and hallmarks in settings. Tripods are also critical to maintaining sharpness; even the slightest hand movement can cause motion blur in close-up shots. Additionally, proper lighting equipment is necessary—diffused, neutral lighting works best to minimize harsh reflections and shadows. Light tents or softboxes help distribute light evenly and eliminate glare. Ring lights and LED panel lights can be useful for enhancing sparkle, but they must be positioned carefully to avoid washing out the image or causing false reflections. Reflectors, black cards, and light modifiers can also be used to control the direction and intensity of the light. Together, these tools allow for maximum control over how the diamond appears in the final image.
Setting Up the Environment: Backgrounds, Props, and Isolation
The setting in which a diamond is photographed can either complement or distract from the stone’s appearance. A neutral background—such as light gray, white, or black—is generally recommended because it provides contrast without overwhelming the image. White backgrounds offer a clean, commercial look and are often required by online marketplaces, while black can bring out the brilliance and fire of the diamond by increasing contrast. Gray provides a neutral tone that minimizes unwanted color casts. Regardless of color, backgrounds should be matte and non-reflective to prevent light bounce. Avoid busy patterns or colorful props unless you’re intentionally creating a lifestyle image for marketing. When photographing loose diamonds, place them on a flat, dust-free surface, and use museum putty or gem-holders to prevent rolling. For mounted diamonds, ensure the setting is clean and polished, and consider photographing the entire piece as well as close-ups of the stone. Using minimalistic props such as a velvet pad or a ring box can help convey luxury while keeping the focus on the diamond. Isolating the subject through a shallow depth of field also helps draw attention to the stone’s most important features.
Lighting Techniques to Enhance Diamond Sparkle
Lighting is perhaps the most critical factor in diamond photography. Because diamonds interact with light in complex ways, capturing their brilliance and fire requires a balanced lighting setup. Natural daylight, particularly indirect sunlight, can be flattering but is inconsistent and difficult to control. Artificial lighting gives more predictable results, especially when using multiple light sources positioned strategically. A three-light setup is often effective: one primary diffused light source to simulate ambient lighting, and two smaller lights at different angles to create highlights and sparkle. Positioning the lights slightly above and to the side of the diamond enhances scintillation and avoids unwanted flatness. Avoid harsh direct lighting, as it can cause hotspots and unnatural reflections. Light diffusion is key; use diffusers or white umbrellas to soften shadows and maintain an even exposure. A controlled environment with light tents or enclosed setups allows you to experiment with angles and lighting conditions while minimizing external interference. You can also introduce black reflectors to create defined edges on the facets, a technique often used by professionals to sculpt the shape and definition of the diamond in the image.

Camera Settings and Manual Controls for Precision
Capturing high-quality images of diamonds requires mastery of your camera’s manual settings. Automatic modes rarely deliver consistent results due to the reflective and refractive nature of gemstones. Start by setting your camera to manual mode so you can control shutter speed, aperture, ISO, and white balance independently. A small aperture (such as f/11 or higher) will help maintain depth of field and keep more of the diamond in focus, especially important for macro shots where the focal plane can be extremely narrow. Use a low ISO setting (around 100–200) to minimize image noise and preserve sharpness. Because you’ll be using a tripod, you can afford a slower shutter speed to ensure proper exposure without introducing blur. White balance is critical—set it manually using a gray card or calibrated setting to ensure that the color of the diamond and any metal settings are accurately rendered. If your camera supports RAW image capture, always use this format. RAW files preserve much more image data than JPEGs and allow for finer adjustments in post-processing, such as correcting exposure, sharpness, and color balance without degrading quality.
Post-Processing: Enhancing Without Misleading
Post-processing is an essential part of diamond photography, but it must be approached with ethical restraint. The goal is to present the diamond as it appears in reality—not to enhance it beyond recognition. Begin with basic corrections such as adjusting exposure, white balance, contrast, and sharpness. Tools like Adobe Lightroom, Capture One, or even Photoshop can be used for this. Carefully retouch dust, lint, or smudges that may appear in the image, but avoid removing inclusions or modifying the diamond’s appearance in a deceptive way. Over-sharpening or excessive saturation can lead to unnatural results, which might mislead buyers and lead to distrust or disputes. If you photograph multiple views or angles, try to maintain consistent color tones and lighting across the images. Crop judiciously to focus attention on the diamond, but be sure to retain enough context to show how the diamond fits into its setting or surroundings. If you’re using RAW files, export the final images in high-quality JPEG format for online use, ensuring optimized resolution without sacrificing clarity. Typically, a resolution of at least 1000 pixels on the longest edge works well for detailed online previews.
Photographing from Multiple Angles and Views
One of the most overlooked aspects of diamond photography is the need for multiple angles. Buyers want a comprehensive understanding of what they are purchasing, especially with high-value items like diamonds. A single flattering photo may capture attention, but a set of well-thought-out images builds buyer confidence. Start with a standard head-on shot that showcases the table (top) of the diamond. Follow this with angled views that reveal crown and pavilion facets, as well as the overall profile. For mounted diamonds, include side views that highlight the prongs, band, and any accompanying stones or design elements. Macro close-ups are particularly useful for revealing clarity characteristics or hallmarks in settings. If the diamond has a certificate, such as a GIA report, consider photographing this document next to the diamond or including a cropped, legible image in the gallery. Lifestyle shots—such as the diamond on a model’s hand—can also be helpful to show scale and wearability, though these should be presented in addition to, not in place of, technical images. The more thorough your photo set, the more informed your potential buyers will feel.
Preparing Images for Different Online Platforms
Each online marketplace has its own image guidelines, and understanding these requirements will help optimize your listing for better visibility and credibility. For instance, platforms like Etsy and eBay recommend using high-resolution images with a clean background, and often enforce aspect ratio constraints such as square or 4:3 formats. Some platforms automatically compress images, so it’s wise to pre-optimize them to retain as much quality as possible. Compress using tools like TinyPNG or JPEGmini to reduce file size without noticeable degradation. Include ALT text for accessibility and search indexing, and consider embedding a watermark with your logo if brand identity is important—but make sure it doesn’t obscure important features of the diamond. When uploading to your own website, use descriptive file names (e.g., “round-brilliant-1ct-FVS2.jpg”) to improve SEO. Include zoom functionality where possible so that viewers can inspect fine details. Organize your images so that the main image is the clearest and most attractive, with supporting images offering technical, contextual, and lifestyle perspectives. Presentation consistency across your listings also contributes to a professional appearance and improves trustworthiness.
Final Tips for Presenting Diamond Listings Professionally
Beyond photography itself, the overall presentation of a diamond listing benefits from attention to detail. Combine your images with accurate, transparent descriptions that match what is shown visually. Mention key attributes such as carat, cut, clarity, and color, and ensure these details are aligned with what the photos reveal. Avoid using filters or exaggerated marketing terms that could create skepticism. If possible, include a short video clip showing the diamond under motion and light; this can help communicate sparkle and realism better than stills alone. Investing in a consistent branding style—such as a standard background or lighting tone across all your listings—builds recognition and professionalism. Pay attention to feedback and A/B test different image styles to see what converts best. High-quality diamond photography is not just about showcasing beauty; it’s about building trust and setting clear expectations. Done correctly, your photographs will not only attract more views but also convert those views into confident buyers.